How To Never Have to Track a UITableView’s IndexPath Ever Again
Index out of range, no more

How many times have you had to deal with the hassles of manually tracking IndexPaths for a UITableView? Or, how many times have you had to debug this before?Invalid update: invalid number of rows in section...
What if there was a way to take the hassle out of managing this?
Introducing View Model-Driven UITableViews
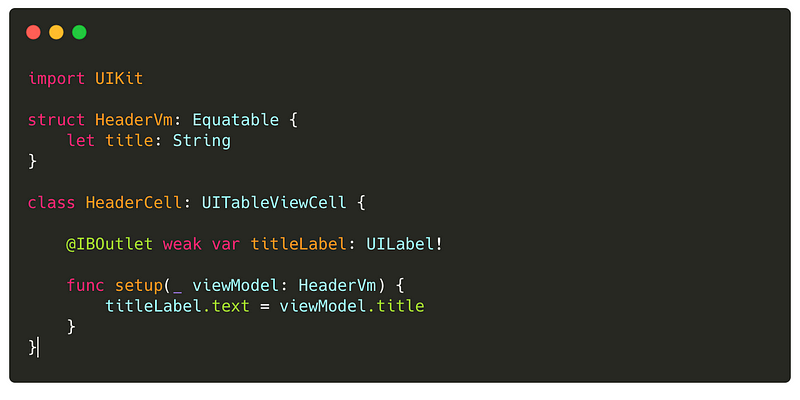
Each UITableViewCell has its own Equatable view model that’s passed to it on setup. Here’s a simple example for a header cell that takes in a label containing a title and sets it on the cell.Helpful tip: The view model's equatable function doesn't need to be implemented if all the properties in the struct are Equatable.
As we build up a list of view models to display onscreen, we may want to support more than one type. In this case, we can take advantage of enums with associated values.
In this example, I have two cells I want to display. Therefore, I use two enums to represent each cell. The associated value contains the equatable view model.

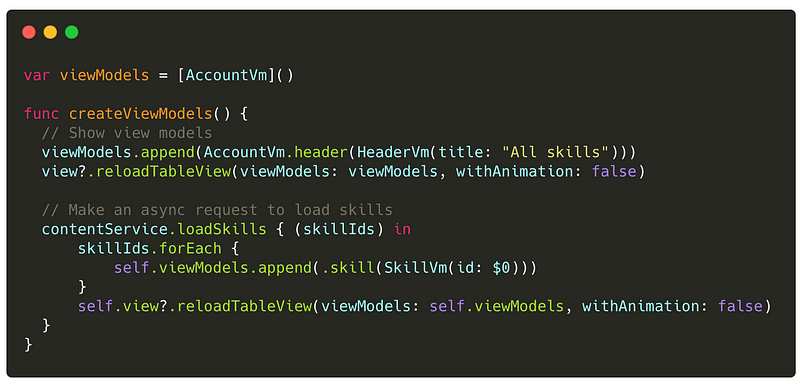
We can then create our view models either from our controller if we’re using MVC, or a presenter if we’re using MVP. Obviously, this will vary based on the architecture of your app. In our case, we’re calling a function on our UIViewController from our presenter to provide it the data once it’s loaded.
We’ll then need to implement the reloadTableView(..) function. This takes a snapshot of the current view models, updates it to be the new view models, and calls a function that we add via an extension on the UITableView.
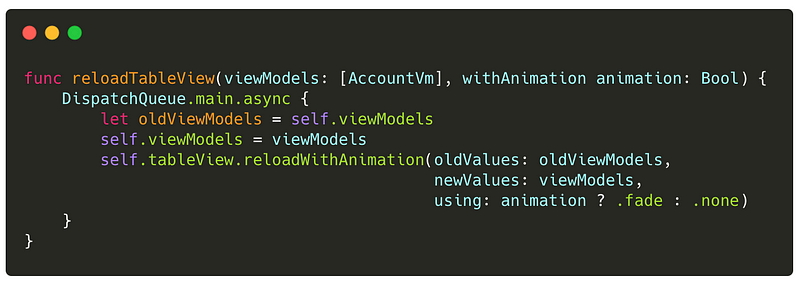
The reloadWithAnimation function called on the tableView can be added into your project using the following file:

You don’t need to understand the workings of the extension, but it essentially differentiates the difference between the current snapshot and new view models and then inserts, updates, and reloads the view appropriately.
Implementing UITableViewDataSource
For the number of rows in the section, we can simply return the number of view models in the array.

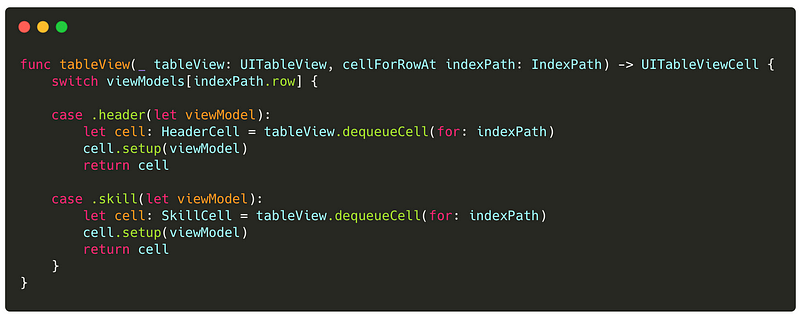
Now, when we dequeue the cell, we don’t need to worry what index it’s for as it’s entirely driven from the view model. We’ve also prevented the accidental fall through that would default to an empty UITableViewCell being returned. Note that the dequeueCell function is a custom extension you can add to your project here. Alternatively, you can use the standard tableView dequeueCell.
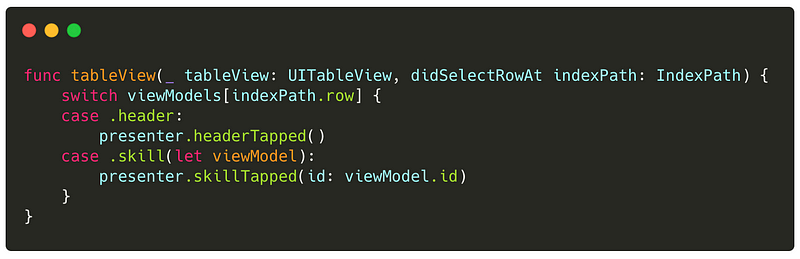
As for handling tap events, we can easily switch based on the selected IndexPath to determine the corresponding view model.
Multiple sections
Easy! All you need to do is make the view model array 2D. The first array represents the sections, and the inner array represents the rows in the section. The reloadTableViewWithAnimation has two implementations that support either approach.
Demo
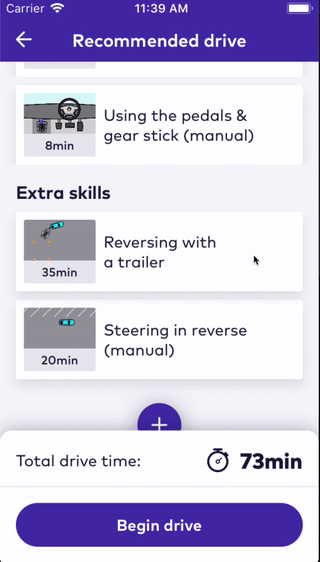
The following example is from a learn to drive application I recently created. I simply move the item from one section to another or remove it entirely. This uses the RowAnimation.fade as demonstrated in the article with custom deletion logic.
Want to Just See the Project?
You can check out the project with all the code on my Github below.
